
Connect Home Assistant to Azure Event Grid MQTT Broker
The Azure Event Grid now supports MQTT as a protocol for publishing events. This is great news for Home Assistant users as it allows us to connect Home Assistant to Azure Event Grid. This blog post will show you how to connect Home Assistant to Azure Event Grid using MQTT.
Create an Azure Event Grid Namespace with MQTT enabled
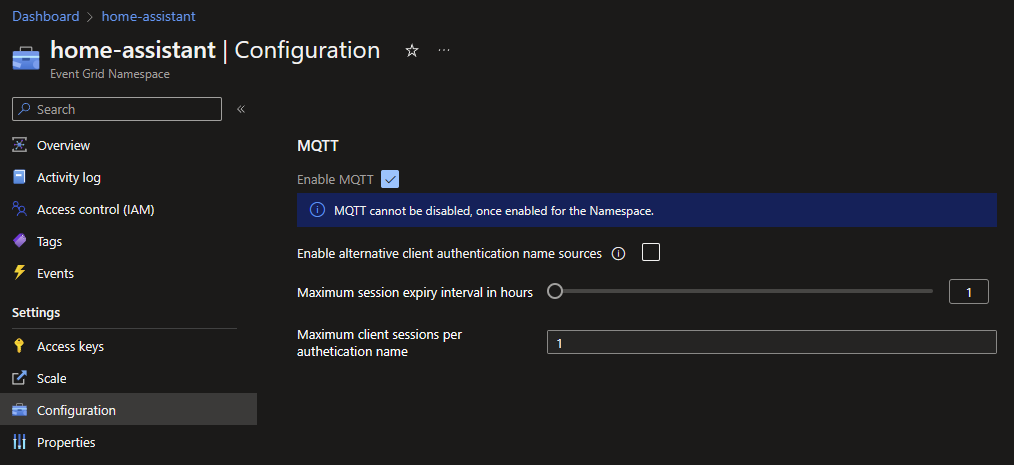
First we need to create a new Azure Event Grid namespace or use an existing one and enable MQTT on the namespace. See the Azure documentation for more information on how to do this.
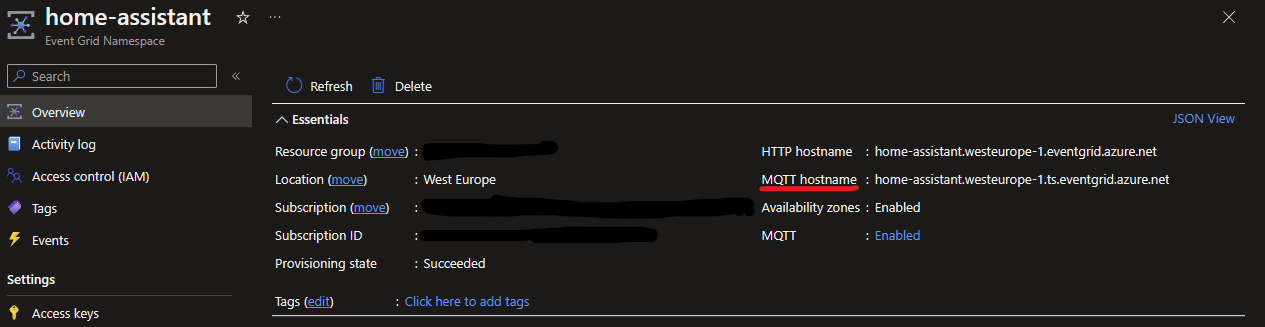
The broker address can be found in the Azure Portal, go to the “Overview” page of the Event Grid Namespace and find the MQTT Hostname. Remember this hostname, we need it later when we configure the MQTT integration in Home Assistant.
Create a client in Azure Event Grid MQTT
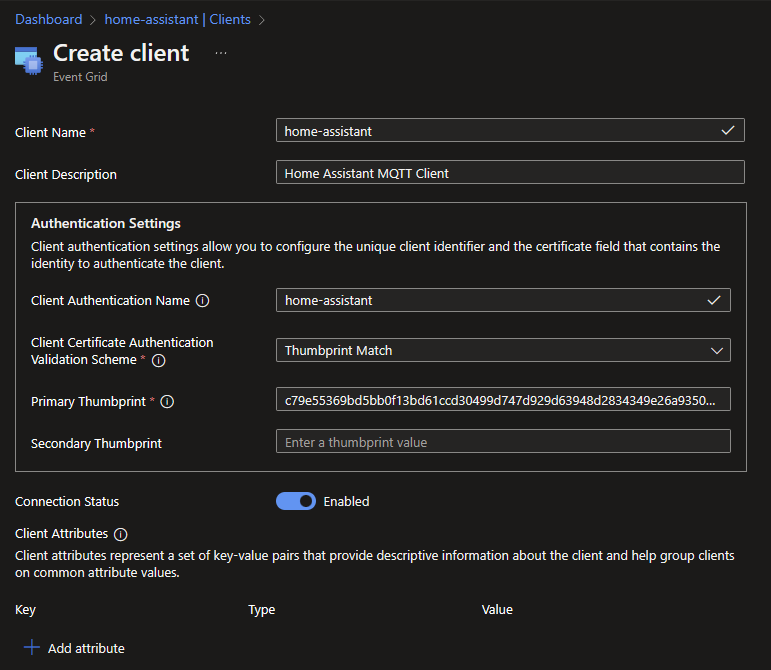
Then we need to create a client in Azure Event Grid MQTT. This can be done using the Azure Portal or with the Azure CLI. How this can be done is described in the Azure documentation. Make sure that you select “Thumbprint Match” as the authentication type when you use a self-signed certificate. Remember the Client Authentication Name. We need it later when we configure the MQTT integration in Home Assistant.
Create a Topic Space
Create a new Topic Space with a topic name of your choice. Add a Topic Template and enable all topics by entering # as a template.

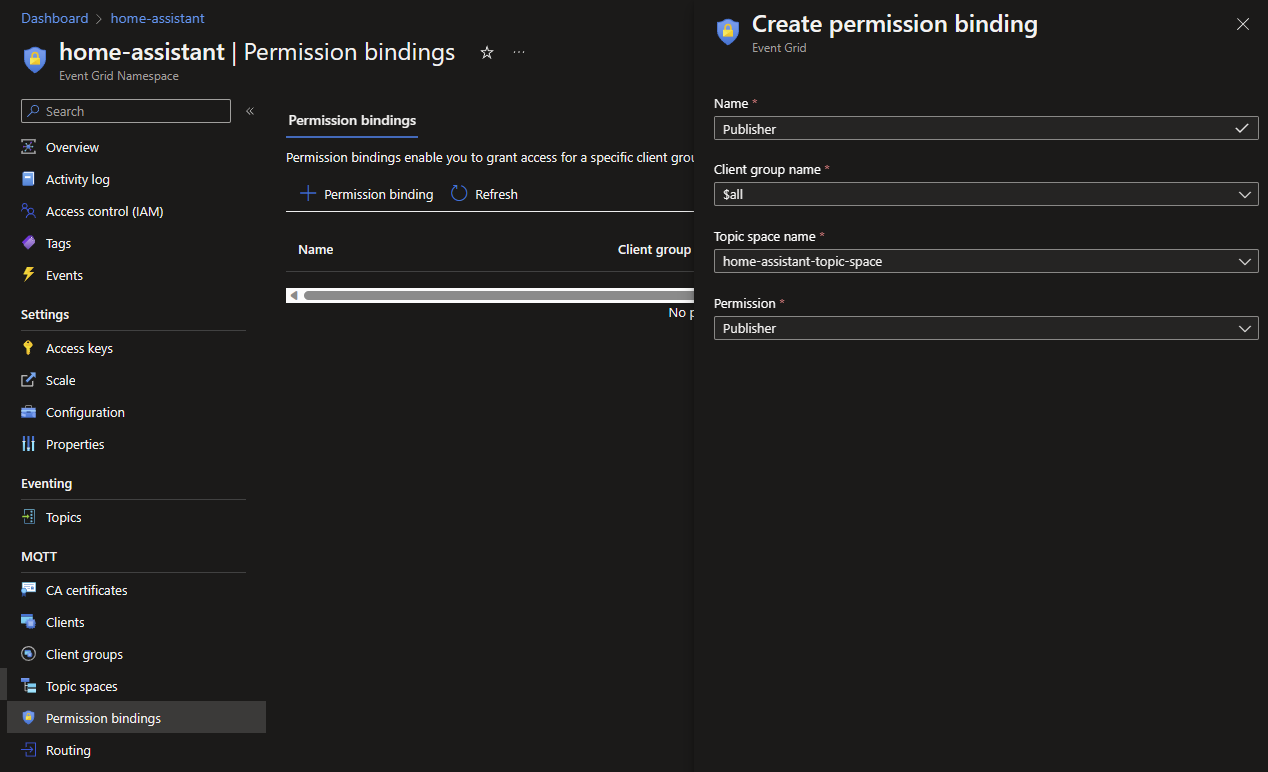
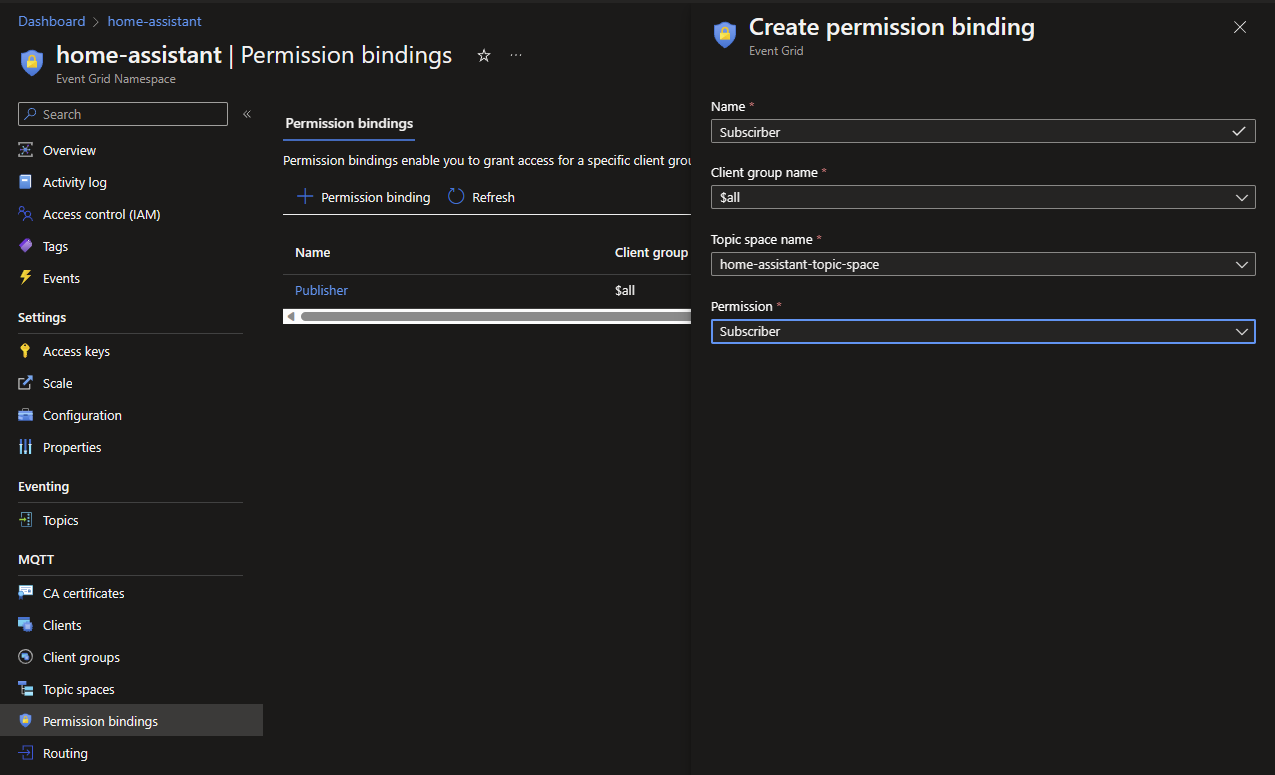
Create Permission bindings
Now we need to allow all clients to publish and subscribe to the topics in the Topic Space we just created. This can be done by creating a new Permission binding. Create a new Permission binding for the Publisher and Subscriber operations for “Client group name” $all. This will allow all clients to publish and subscribe to all topics in the Topic Space.
Home Assistant configuration
To enable Home Assistant to connect to the Azure Event Grid MQTT broker we need to configure the MQTT integration in Home Assistant. Because we need to set some advanced settings in the MQTT integration, we need to enable the Advanced Mode in the Profile page of your account.

Create a new MQTT Integration
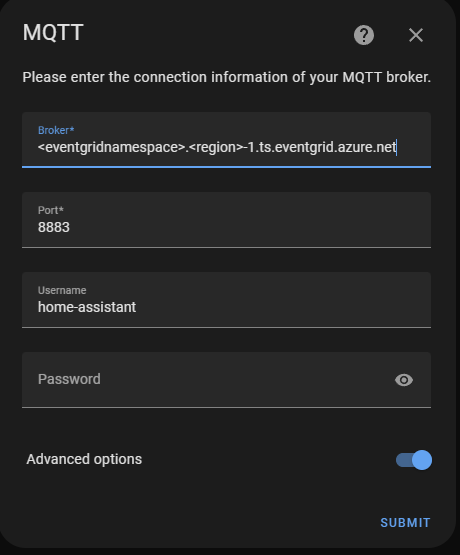
Create a new MQTT integration in Home Assistant and configure it to connect to the Azure Event Grid MQTT broker.

Fill in the MQTT Hostname in the broker address field. Set the port number to 8883 and set the Username to the one created earlier. The Password filed can be left empty.
Enable “Advanced options” and click Submit.
Enable “Use a client certificate” and click Submit.
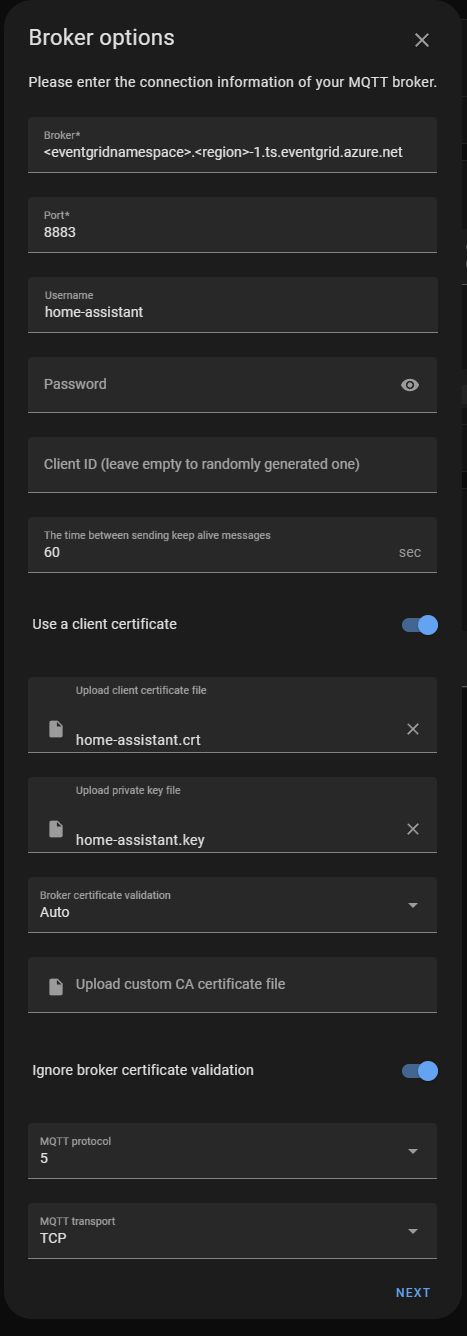
Upload the client certificate and private key that you created earlier.
Set “Broker certificate validation” to “Auto”. You can leave the “CA certificate” field empty.
Enable “Ignore broker certificate validation”.
Set MQTT protocol version to 5 and transport type to TCP. And click Submit.
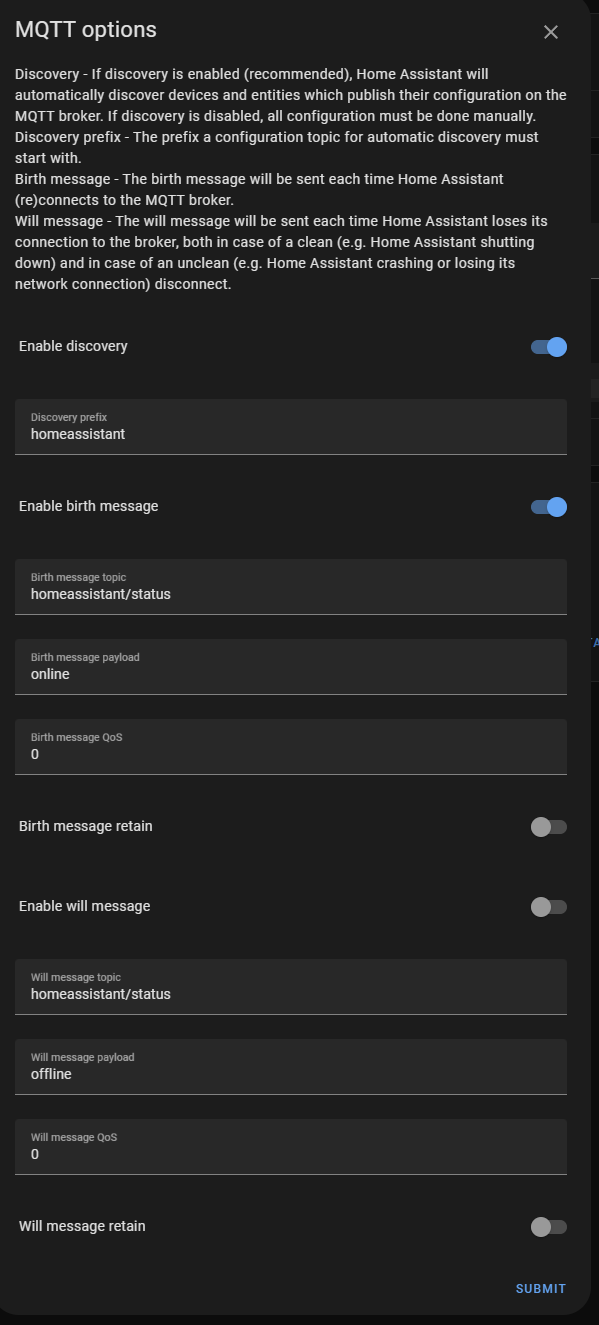
Disable will message
On the next page, disable the “Enable will message” option. This doesn’t work with the Azure Event Grid MQTT broker. You can choose to disable the “Enable birth message” option as well.
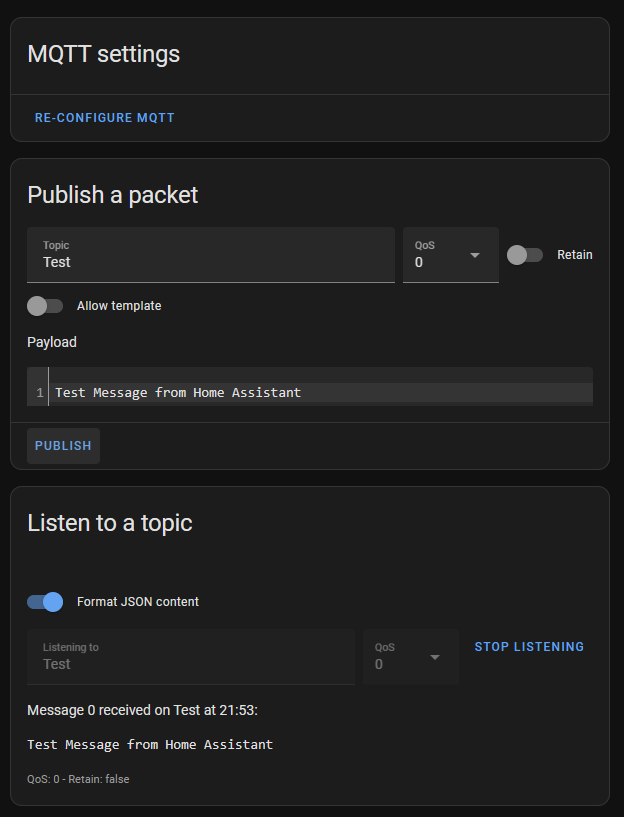
Test the MQTT connection
You can test the MQTT connection on the MQTT configuration page. First start listening to the Test topic. Then publish a message to the Test topic. You should see the message appear in the putput.
That’s all folks. You can now use the MQTT integration in Home Assistant to subscribe to events from Azure Event Grid MQTT broker.
Comments